Just realized I was still pointing at Feedburner for my rss feed, and like everything else Google releases, one of these days it’s just going to stop working and disappear.
So to get ahead of that inevitable dark future, please update your reader to the local feed: https://driph.com/words/feed/
The first computer my family owned was an Atari 400, the 8k entry-level machine with a membrane keyboard so kids wouldn’t muck it up with their grubby hands.
I learned to type on that keyboard, ingraining a stompy two-finger typing style that I’ve never been able to shake. On the night my dad brought it home, we all gathered around the portable TV with a 4inch black & white screen that the Atari was plugged into and played Star Raiders.
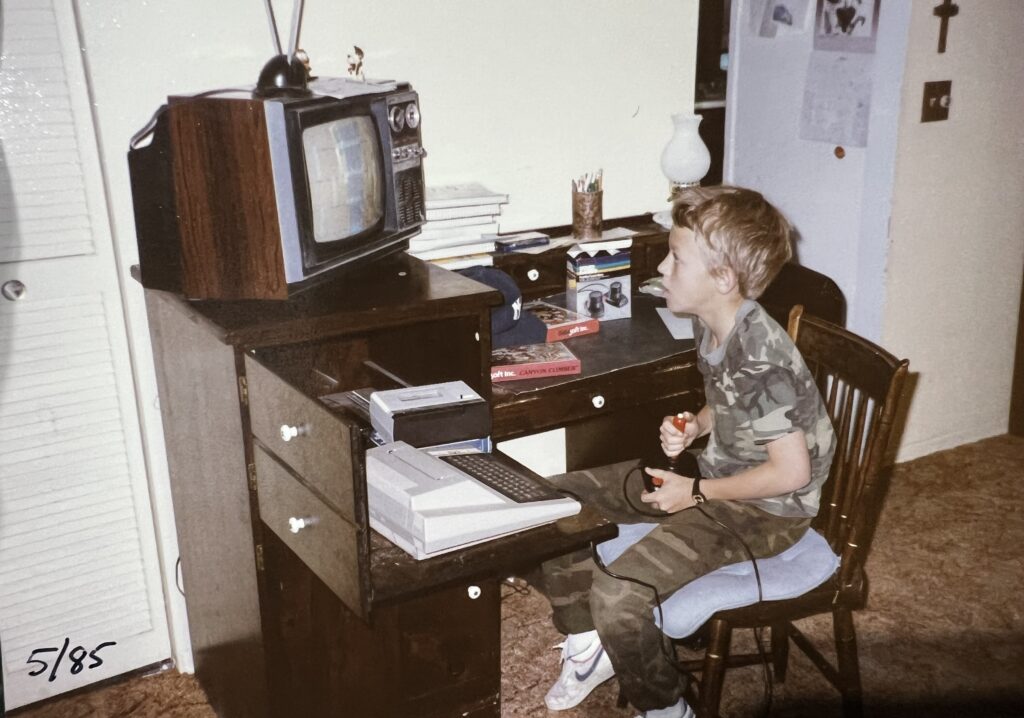
Me playing Canyon Climber on the Atari 400 (by this time we’d replaced the little portable tv with a proper television). Look how minty fresh white that 400 is!
There was a BASIC cartridge, too, but that was dumb and boring because Star Raiders. A couple years later the 400 was upgraded to 48k.
Our first modem was a 1200 baud Prometheus ProModem, purchased alongside an Atari 800 in the mid 80s. Compared to the 300 baud modem socketed into the back of a friend’s Commodore 64, it was blazing fast, with text appearing faster than I could read it. I used that modem well until after 1200 baud was slow.
Okay so the stock Alien pinball machine has that generic yellow launch button, which makes sense if you’ve got it out on location or something, but for home use, I wanted something that fit the theme a little better.
Took a screenshot of the ENVIRON CTR PURGE UI from the first film, cleaned it up a bit, drew the missing bits of a few text characters, and printed it onto milky transparent film.
Cut out the art, inserted it between the backing and cover of a blank white launch button, and we’re good to go!
My goal with these was to make them look dated, like something that’d been sitting around on a shelf since after the war.
Broken Token laser-cut birch pieces are thin. To give the box corners the appearance of being nailed on, I clipped the heads from nails and glued them to the corner pieces with E6000. The corners themselves were then attached to the boxes with E6000 as well.
For the ABCD and propaganda posters, I weathered the art in photoshop and then printed the pieces on clear waterslide decals, hoping that the lack of white would make it look like the inks had faded over the years. I applied multiple layers, as if posters had been pasted over posters, with heavier duty weathering of the “earlier” layers.
Central Powers on one side, Entente on the other.
ABCD decks (2 of each) along the edges, and XYZ decks (2 of each) in the middle.
Ready to play! One box is for myself, the other will be going to my dad, who I suckered into picking up “just a few planes” earlier in the year.
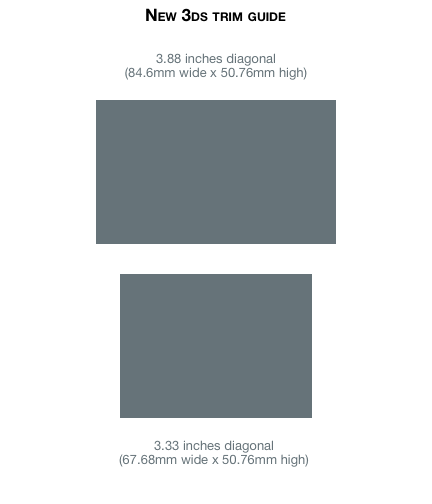
For anyone else that picked up a New 3DS today and is making due with trimmed XL screen protectors until properly sized versions arrive, here’s a guide I threw together to make it easier to trim those larger overlays down to size.
(the image itself it 6×7 inches, print at actual size)